Wednesday, November 12, 2014
Archer #1 + Moss #2 = Sunny Days
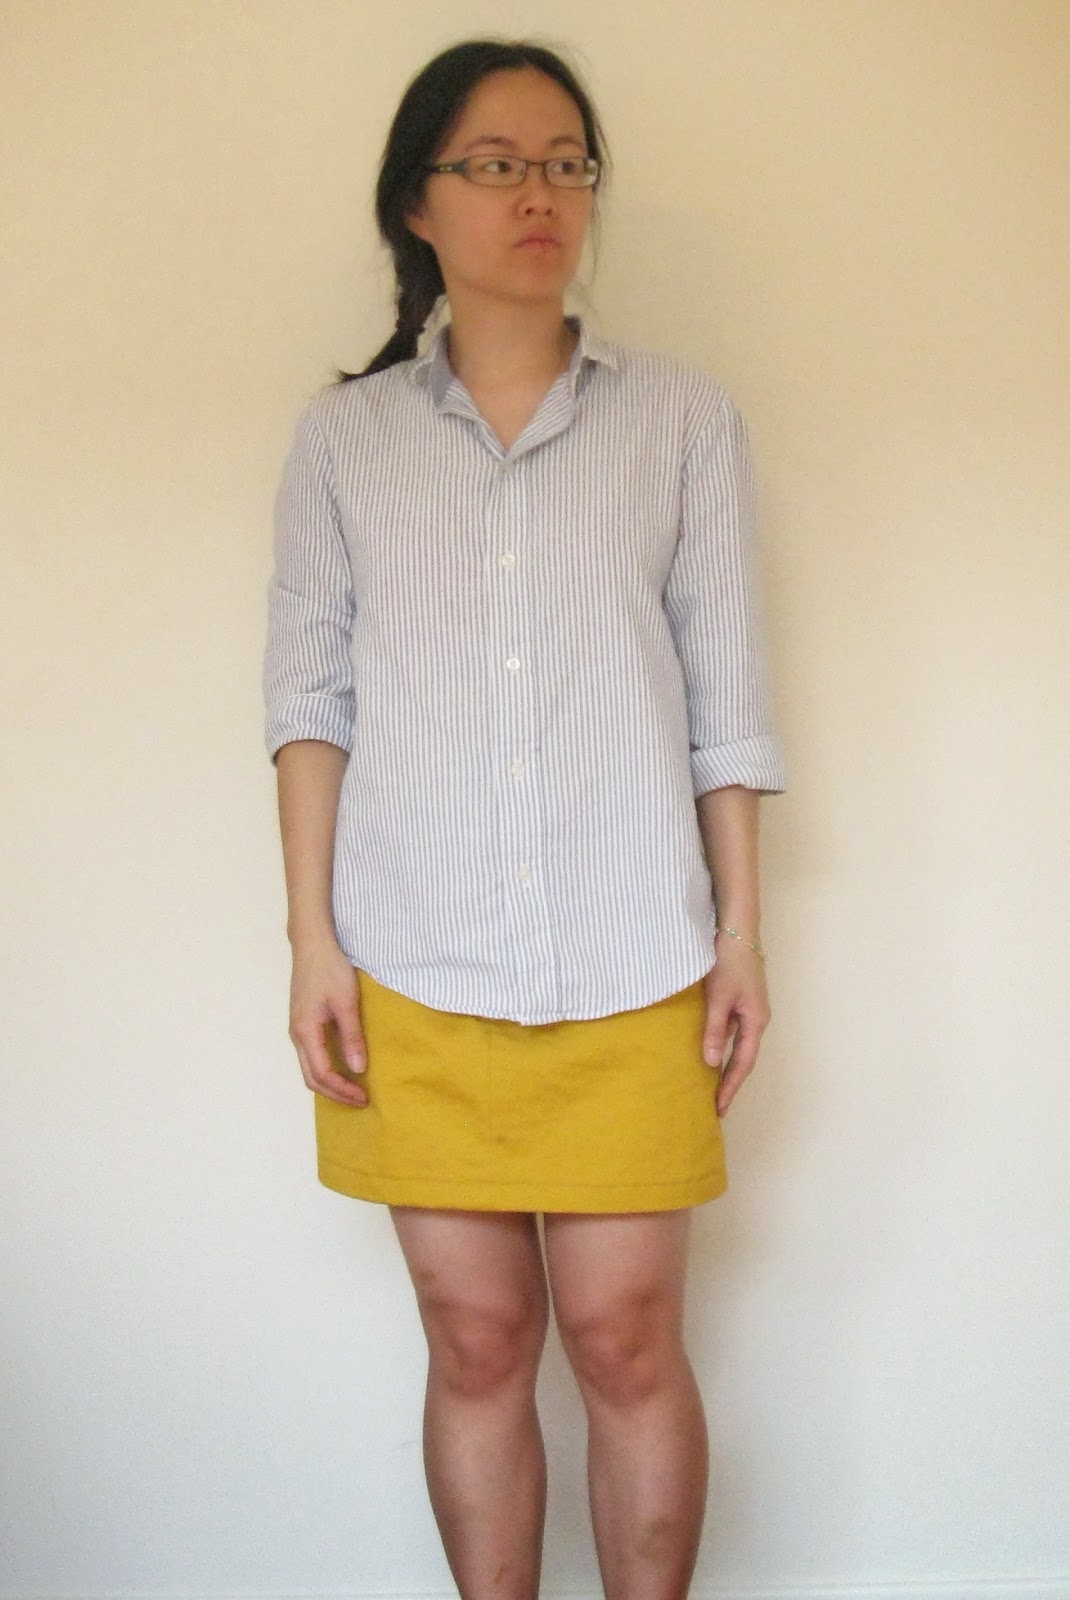
Archer #1. Refashioned from an old men's shirt. Gosh, I love this thing. I didn't have enough fabric for the cuffs so I made, er, a cuff "facing" and decided that bracelet length was just the thing. I often roll up the sleeves anyways. I always feel perfectly chic in a slightly slouchy way, every time I put this thing on. It's a look that's hard to pull off, but in Archer, I feel like I can do it. This look is growing on me.
Moss #2. Mustard cotton twill, zero stretch. With one of Tasia's labels~ I love them so! I eased the waistband by 1" on my last Moss, and really wish I'd done so on this one as well. It allows the waistband to hug just enough that the skirt doesn't scoot around during the day, and yet doesn't feel restrictive. (Mark Center Back notch, mark side seams; cut waistband 1/4" shorter than pattern calls for in 4 places: along the right front, left front, right back between side and CB notch, left back between side and CB notch. Ease in 4 places. Super simple)
What I love even more than my Archer and my new Moss? Wearing the two of them together. Archer #1 goes pretty smashingly with Moss #1, but this is such a happy, sunny combination, I think it's got me won over.
And just in time. Moss #1 was starting to look a little faded and worn (I wear it multiple times each week if I can help it). Plus, what says "fall" like a splash of mustard?
Hope your fall sewing has been going well so far :-).
Saturday, September 01, 2012
Outfit post: summer dress into fall (plus some ramblings)
Around this time of year, the weather around here vacillates between summer and fall. The San Francisco bay area is notorious for its Indian summer come September and October (really, the best time of year to visit the area), but between the fog and the shortening days, we also have our share of cooler days as well.
Awhile ago I commented to Scruffy Badger that my wardrobe planning/purchasing/making tends to go by my rules of "5"s which are my personal guidelines for a wardrobe that is cohesive, functional, minimal "enough," with a little room for spontaneity. Will I get $5/wear out of this? Does it go with at least 5 other items of clothing that I already own (items in the "to make" list don't count)? Can I wear it through 5 months (or 3 seasons)?
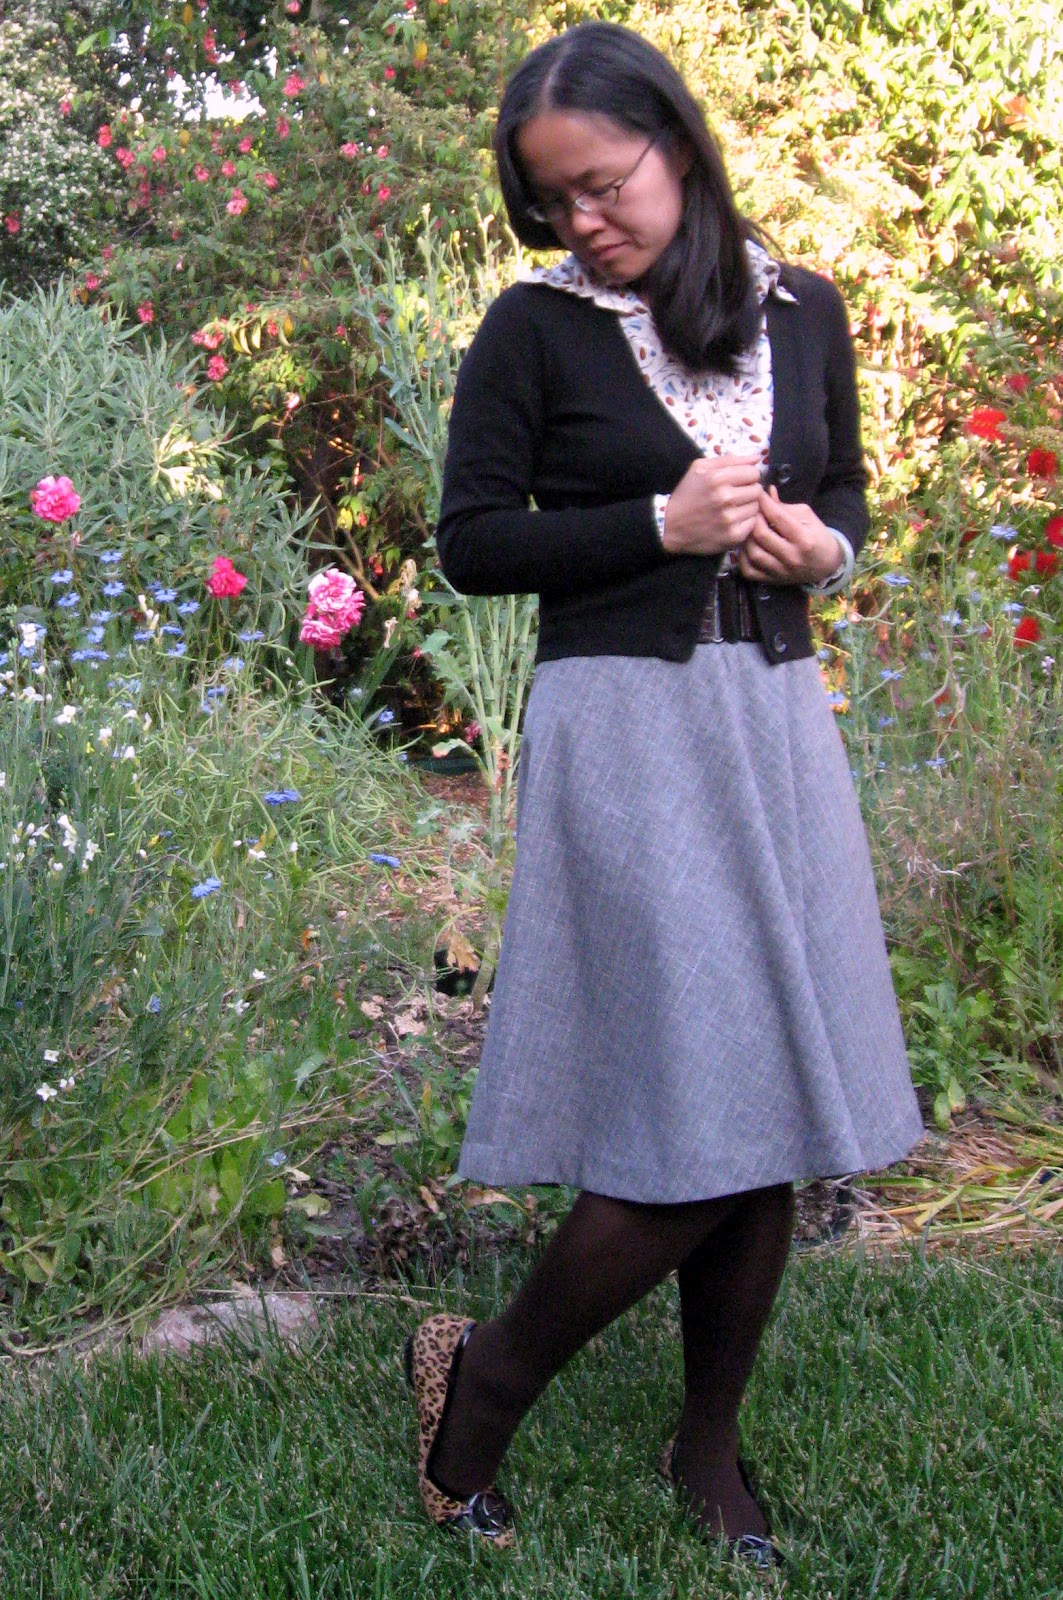
This outfit is a classic example (wouldn't it look great with a skinny mustard belt for a wee bit of color?). I try to make or buy summer dresses that can also layer into spring and fall, and if I can't think up at least a couple ways to layer a summer dress so that it can bleed into the months that bread-end summer, I don't make it. I call this my "eager intern" blazer because I thrifted it while sourcing wardrobe for a short film I was working on, and though the actress who played our eager intern didn't wind up using it, I kept it in my wardrobe because it was a neutral, cropped (therefore pairing well with dresses), and a bit funky. For me, I find that a few carefully selected layering pieces can go a long ways. Cardigans, little jackets, leggings or tights, scarves and boots all fall into this category, and really, you only need 1 or 2 of each.
This morning as I lay in bed I reread parts of Your Money or Your Life, and just as I reached the part about "enough" and the peak of the fulfillment curve I happened to glance up at my open closet, and I thought, "I have a nice closet of dresses. Most certainly enough."
(As an aside, it's interesting to note the composition of this suite of dresses. 5 are handmade, 5 come from China, 3 are thrifted, 1 comes from a boutique in Oakland, and 1 was handmade by an Etsy seller. I am fine with this ratio. Also interesting, for somebody who doesn't claim to like black very much, I have a lot of black dresses. Brown and red/orange, too. What's funny is that my favorite color is blue. I'd love to add yellow or purple into the mix. Is 15 too many summer dresses? Probably, but I'm OK with it. By the end of next summer, I imagine at least 2 or 3 of these will be gone from the mix.)
Now that my crafting mojo has returned, I have this impossibly long list of makes that I've been itching to get at, but this morning I realized that really, I don't need most of them. And the mental stress of ploughing through the list doesn't seem very satisfactory, somehow. This is even more true come fall, since between my love for knitting sweaters and making/refashioning skirts, I already have more than "enough."
So I lay down the book and mentally reevaluated the list to winnow out the "lark" projects and focus in on what fit that sweet spot of wardrobe "gaps" (taking the word loosely) and projects that excite me. The list is now about half as long, which feels good. Yes, I still plan to knit sweaters and sew skirts because those are my indulgence handmades, the things I love to make and thus will not deny myself because we all need a couple indulgences in life. Just not quite so many.
Saturday, June 09, 2012
MMM roundup
*Bright + bright
*Neutrals + neutrals
*Pattern + pattern
Confused? Let me illustrate:
(Handmade skirt)
Why only wear one bright ass skirt when you can also pair it with bright flats? (bright + bright)
Why wear one neutral when you could wear several? (neutral + neutral)
Why only have vertical stripes ... why not horizontal ones, too? (pattern + pattern)
In short, I am a fan of more, more, more. But, generally speaking, only in these 3 categories.
I try to show some restraint when it comes to work. Bright shoes with a bright cardigan? Passable. (If I was still a student or working in one of my old jobs, likely that would have been bright cardigan + bright skirt + bright shoes + bright brooch.) Black and white bias-cut button down gingham with black? Hits neutrals and patterns at the same time.
One way that I have found to keep pattern clashing from veering too far into Visual Whoa territory is to pair classic patterns together. Here, stripes and plaid. Plus, red, blue and white is a classic combination.
Sometimes, in a futlie attempt at subtlety, I will only attack 1 out of the 3. On this day, I kept it to bright + bright (+ bright).
I do like how bright shoes can add more color to an outfit. Makes the bright + bright philosophy less overwhelming but still fun.
Sometimes the bright + bright is subtle. This outfit is dominated by neutrals working together, but it's all about the mustard flats and the way they pick up the yellow in the scarf. My coworker said she thought I looked European in this; must have been the scarf, which is a vintage French one!
(Handmade skirt)
Occasionally I do tone things down quite a bit and compose an outfit of neutrals. But even then I like to mix my neutrals to keep things interesting. And I couldn't resist some pattern mixing, too. It's hard to see, but this thrifted blouse has this great 70's-colorway-meets-Scandinavian-print aesthetic going. A couple interesting printed blouses go a long ways in the office.
You may have noticed that I rarely wear denim, but it's my "staple" for those closet orphans I've made through the years. I keep forgetting how much I love this tank, probably because it's never warm enough here to wear it.
(Refashioned dress)
And, when all else fails, I just grab this gray blazer and toss it over whatever latest handmade to come off the sewing table, for those garments I'm too excited to wear but harbor secret doubts over their passability in the office. Gray, conservative thrifted blazer --- perhaps you are my wardrobe essential #7!
Saturday, March 31, 2012
Outfit photo: 5 wardrobe essentials
Essential #1: Denim jacket. Goes with pretty much everything - dresses, skirts, pants, tunics; prints, solids, bright colors, neutrals - and if you're lucky enough to work in an environment where it's passably OK to show up in a denim jacket as I do, 1 jacket will take you through 85% of your lifestyle needs for 2 seasons, possibly 3. I like to casually rumple the sleeves up midway as you can see.
Essential #2: Boots. I like mine flat, waterproof, and comfortable. Your criteria might be different. These may be a tad casual for work but I wear them in anyways. Great for commuting and for pairing with skirts or dresses in fall, winter, and early spring.
Essential #3: Basic cardigan. Mine is black and slightly cropped, thin and very fitted, which means it layers really well over pretty much every blouse and dress I own and, again, works for both office and hanging out with friends. For me, the cropped length works really well with my height, but also means that if I button it over a blouse that hits at high/mid hip, it gives me a bit of a waistcoat/vest look. Multiple looks, one cardigan! I think I've had it for 4 or 5 years now and the elbows are finaly starting to show some sheen and it doesn't quite hold its shape. Sigh. Hate the thought of scrounging up a replacement, its utterly perfect. (My "Casual-er Friday" look)
Essential #4: Fun tights. Gives any outfit a kick when you just can't be bothered with making it lively. I love these mustard ones, although they are eerily kind of close enough to my regular skin tone to possibly make me look jaundiced-like. Besides bright tights, patterns like argyle or stripes work well (I don't do dots because they stretch terribly across my calves and thighs), or unexpected neutrals like olive green.
Essential #5: A dress you adore. For when you really don't want to think about what to wear but still want to look good. I tend towards bright and quirky, what can I say?
And my bonus essential, Essential #6, is a neutral, patterned scarf. The neutral colors mean it will go with pretty much any outfit you put together, but the pattern gives additional visual interest. And, because its neutral, you can wear it repeatedly without looking like you're wearing the same thing over and over again.
Sunday, June 05, 2011
Blouse Sloper, Part 1
So I headed home and pulled out a thrifted mens shirt, a cotton/poly blend in a vibrant blue, and got to work muslining out my new sloper.
Oops, missed a button! I decided to keep the buttons in the back for a vintage-esque look. I'll probably swap them out for buttons a different color. I like the fact that I don't have my usual swayback issues. I'm wondering if this is because the sloper is cut such that it does not decrease in at the side seam towards the waist - instead, all the back waist shaping is via darts. I've never seen that done before! However, I have something of a broad back and well-built deltoids, so I'm wondering if I should really be leaving all that waist shaping to darts.
Finally, in honor of Me-Made-June (I'm not participating formally, but I'm with you all in spirit!)
Handmade shrug, refashioned dress. Shoes DIY'd ala Mom. When I bought these flats, they were nude -- nude, as in, the exact same shade as my skin. SO not attractive. So she dabbed brown shoe polish on them and now they are 1 shade darker than I am. Much, much better. (If you were curious, we bought them with the intention of darkening them. They looked so ... sickly ... at the store.) That Mom, she is the queen of DIY improvisations, is she not?
It runs in the blood. She may have no desire to sew her own clothes anywhere, but she's still got the spirit.
Sunday, May 08, 2011
Refashion #26 // Dress #5 :: Flutterbudget
That was Charles Ingall's nickname for his daugher Laura, wasn't it? I remember loving that series so much, especially the improvisational way they created a home from ... from scratch, really. That creating, that spirit of making do, those were the passages I would read and reread as a kid ... still do, when I'm feeling nostalgic. Maybe that's part of what drives my interest in refashioning and why it called out to me, so instantaneously, nearly 4 years ago now.My latest dress, another dress refashion (we're aiming for 80!) ...
From this:I think it's a sundress from ... the 90's? The 70's? Anybody? I zoomed in on it immediately in the thrift shop; something about the pattern really drew me in. And of course, we all know that overly large is OK when refashioning, and actually larger is better because it provides more source material. The dress had been worn so often that the tag has faded and I cannot tell what size it is marked at, or what the material is, but it's a lovely, cool, soft and drapey fabric that feels like it was already well loved before I got it, and doesn't look one bit worn.
To refashion this, I first took up the dress by about 2.5" on each side by flipping the dress inside out and stitching 1.25" from the original shoulder seam line. This lifted the entire dress so that the empire seamline hit under my bust instead of just above my natural waistline. As a kid, my mom used to adjust some of my dresses like this until I grew into them. It's a handy trick for petites to know ;-) ... especially if you don't want your bra strap showing at the armholes!
Initially I'd planned to just hem it up and call it a day, but when I tried the dress on and looked in a mirror, it looked a little ... underwhelming. My body type is such that, if I don't somehow emphasize my shoulders, I tend to look very rectangular (whereas if I incorporate my shoulders into the silhouette then it gives the impression of an hourglass). So I used the 6" fabric strip from the bottom of the dress to play around with sleeve options, and this is what I settled on:

I utilized the hem of the dress as the sleeve hem, slid the raw edge under the armhole, pinned, and then pinned a couple pleats around the top edge of the sleeve cap. As I got towards the middle I started "slanting" the fabric inwards, so that the sleeve hem "enters" the armhole about 1" from the very bottom of the armhole. I stitched straight over the original armhole hemline, leaving raw edges underneath on the inside of the dress, which I then covered with some hem tape (handstitched in). It took some pinning and repinning, and the sleeves are definitely not symmetrical but with the flutter and the drape of the fabric, nobody can tell!
Sunday, November 07, 2010
Refashioning Handmades
This started out as two skirts: a thrifted bias-cut blue and brown plaid wool skirt that was tea length and just tight enough to warrant the wishful thinking "if I lost 5 pounds this would fit perfectly!"; and Skirt #2, never blogged, a navy fine-wale corduroy skirt traced off my favorite denim skirt at the time - fitted through the upper hips, then flaring out slightly to an A-line, with cute patch pockets in the back (the denim version bought from a Japanese department store in Taiwan, so you know the detailing was nice!). Unfortunately, Skirt #2 suffered from that hip-bubbling-incorrect-petite-length problem that all my fitted-at-hip skirts experience, and never got worn.
Initially I had just planned to refashion the wool skirt, so I cut 4" off the top and then improvised some asymmetrical pleats in the front and 2 pleats in the back, one over each, er, cheek. But when I tried it on it looked all wrong. First of all, I got that puffy bum look going, and moreover the asymmetrical pleats in front needed something extra to prevent them from looking like pleats that were mistakenly placed to one side only.
Still not yet satisfied, because the pocket patch looked a bit random from the front, I decided to hack off the bottom of one skirt and attach it to the lining of the second. I'm pretty sure there's a better way to do this, but I just made a straight cut across the bottom, basted it to the lining, and then used a piece of bias tape to cover the raw edges:
And tada! A completely reworked skirt. By now you can see that the corduroy is starting to show signs of wear because I'm always reaching for it.
As a sometimes-quilter, I often find myself making little stacks of coordinating fabrics. In this case, the contrasting textures of the corduroy and plaid wool drew me in, and I loved the contrast in scale between the pin dots in the brown quilting fabric and the plaid. Mixing fabrics in dressmaking can be challenging since you're not just matching fabrics, you're also matching them to a pattern, matching drape and print scale, and then matching the finished garment to the rest of your wardrobe.
As much as I love the effect you can get from combining fabrics in a single item of clothing, I find it pretty challenging to make it work ... and to not get the "hm, a patchworked vest, interesting" vibe (although I firmly believe that patchwork can work in clothing, but it's tricky!) I think all the mixing and matching here works because the skirt has a pretty streamlined A-line shape, it's visually interesting with just enough "funky" to keep me satisfied, and the navy and brown are both neutrals which makes it easy-ish to match.
I wonder if I'm the only person who fights this urge when they sew clothing? Or if other people are veritable fabric-matching-junkies like me, how do they incorporate these into their garments?
Monday, October 11, 2010
Mini-Tutorial: Converting a pullover sweater to an embellished cardigan
Mini-tutorial for you to refashion your own embellished, swingy, customized cardigan from a pullover sweater! I realize some people have a knack for looking at something and realizing immediately what steps it takes to create a similar DIY look, but for others the instructions and tips can be helpful. I do apologize that this is more like a list of steps with some photos than a full-blown "how to," but it's also my first mini-tute so I hope to get better at them in the future!
I started off with an oversized crew neck sweater. Because we're grabbing the excess sweater material and overlapping it in the front to button up, it's important that your initial sweater be several sizes too large!
(Apologies for crud on mirror. Cleaning that off apparently falls rather low on the priority list around here.)
Step 1: Locate middle of the front of sweater. Carefully cut open the sweater so that there is now a front-left and front-right panel.
From here, I like to finish the raw edges of my sweater front panels because I don't want them unraveling on me! For this project, I used some ribbon, but bias tape would work equally well.
Step 2: Attach ribbon to front sweater panels.
You could machine stitch this. I was having trouble keeping it non-ripply, so I hand stitched it.
Step 3: Turn ribbon under and blind stitch into place so that stitches barely show through on right side of fabric. This is what it should look like once you're finished with this part:
[Sweater, right sides facing out, and I flipped over the interior of the cardigan to show you the ribbon facings.]
Step 4: Pulling the cardigan fronts together so they overlap, determine how much overlap you'd like and mark snap placement. I used 3 snaps but you could use more or fewer. Then I sewed decorative buttons on top of the snaps so that it would look like I buttoned up the cardigan.
At this point, try on your cardigan to see how you like the fit. If desired, shorten sleeves to 3/4 length (you could use a similar technique of folding under and covering with bias tape. I'd recommend bias tape or anything that stretches, since stretch is more important for sleeves than for the straight front edges of your cardigan).
Optional: Take in the cardigan arms and sides if still too big. Mine looks like this, but I will say that I am not sure this is the proper way to do this. I turned my cardigan inside-out and pinned out the excess under the arms and at the bust area, then machine basted and checked for fit.
Step 5: Embellishments! I mostly used the flower patterns from Crochet Adorned, specifically the Egg Flower, 5-Petal Flower, 5-Petal Pointy Flower from the Garden Party Cardigan, and the Daffodil from the stitch dictionary in the back ... but you can find a bunch of free patterns here, or there's this and this or tons on Ravelry. I also made up my own pattern for the tiny flowers, as follows:
round 1: ch 4, slip stitch to first stitch in chain, creating a ring with 4 stitches.
round 2: (ch4, sl1) into ring 5 times. Bind off.
Details to make your life easier:
1) I used a worsted yarn and crochet hooks size G to I to get chunky flowers. For me, this produced flowers that were 1", 2", 3" and 4" in diameter. You want a good variety of sizes to create a visual tension and interest.
2) I made a total of 17 flowers: 6 tiny, 6 small, 4 large, 1 XL. I put 5 on each front panel and 7 on the back. If I had planned the back better, I probably would've made more to create a denser look that matches the front.
3) I am 5'2" and usually wear a XS or S in RTW tops. So if you are much taller or larger than I am, you may want to make larger flowers, or more of them.
Regarding embellishment placement, I personally liked the contrast between the small and XL flowers on one side, balanced by two large flowers on the opposite side. But play around with what you like best, and be sure to try it on before you commit because embellishments look different flat vs. 3D!
To attach the flowers to the cardigan, I stitched along the outermost edge of the flower, like so:

Hm ... but don't pull so taught that it causes puckering. Red thread used for contrast so that you could see it, on the real thing I used a dark blue.
And that's it! Time to strut into Anthropologie for some crafting reconnaissance as you wear your newly embellished, completely one-of-a-kind cardigan :-), and mentally calculate how many cardigans you can sew/refashion/knit for the price of one of theirs ...
Let me know if you have any questions or if this is unclear, and I hope this is helpful!
Wednesday, September 22, 2010
Following Your Joy (Skirt #24: Scooting Right Along)
But what I realized is, hey, quirky is who I am. I am most ecstatic about the projects that have an element of playfulness to them, and for me, one of the truly unique qualities of handmade is being able to use fabrics that you really can't find in RTW venues. So I decided, for all those fashion outlet/bloggers that look down upon sewing with novelty prints or whatnot, well, who died and made them king of the universe anyways? If it brings me joy, and I'm the one slaving over the dang sewing machine anyways, then heck, I better use some fabric that I absolutely adore.
But in a nod to upgrading the wardrobe slightly towards passable-in-a-professional-setting, I began tinkering around with self-drafted pencil skirts again. I've always had this particular Achilles heel in my self-drafted pencil skirts though:
Very random "bubbling" or "rippling" effect that I get at the hips. And always more pronounced on the left side than the right. It took me ages to realize, hey, taking it in horizontally until there is no ease left doesn't get rid of the rippling ... I need to take a VERTICAL tuck!
Turns out that when the Sew What! Skirts formula called for 8" between waist and hip, they did not mention that this is actually a range of 7"-8" in most women ... and that, you guessed it, as a petite lady, I'd verge closer to 7" than 8". Also, apparently, I need more of a tuck on my left side than my right. I blame badminton for permanently asymetricalizing my hips and thighs.
Tada!!! This is an Echino cotton/linen blend, and MY but it is FUN to wear about. Fully lined in rayon bemberg [I believe my exact words were: "I see why people hate working with this $#@%!" ... but definitely worth the effort]. Used Tasia's tutorial for lining up prints, Sunni's tutorial on the sewing in a back vent with lining, Sommerset's tip about reinforcing a clipped point with Fray Check and organza, Sunni's advice to use organza on the back seam to prevent warpage, and Gertie's advice to prevent the waist seam from warping with similar means [sorry, can't find her exact link right now].
Woohoo! My pencil skirt sloper still has a couple minor quirks to work out, but I'm super excited about this skirt and others to come ...
Oh yes, and I read in Stitch to put a layer of tissue paper under silk to prevent slippage when cutting ... do you think that would work for rayon bemberg too? Cuz I love the end results of this stuff and would like to decrease the number of 4-lettereds I utter when using it.
Friday, September 03, 2010
How Simplicity 3835 lost 1K
So anyways. It seemed like an awful lot of trouble to go through for some fabric if I was just going to waste it on a so-so project, so the fabric lingered in my stash forever. Finally, when I cut out that second S3835 blouse, I said, screw it, let's just cut two, at least the fabric won't be collecting dust!
It took 16 months for me to make the first cut, and another 16 hours to realize, bad idea. Ugh. Go me. Anyways, after much thought, I decided I could probably salvage the pattern pieces with Simplicity 2614 [love this version here! Oh, that red/orange plaid totally gets under my skin] if I cut everything on the grain and cut the back piece out of my remaining fabric. Which worked, and I now have the barest scraps remaining of this delightful fabric. Boo, poor planning, but yeay, thinking on my feet. Ish.
Blouse #5: Gathering Posies.
For a blouse made out of quilting cotton, it's pretty good, actually. I had to insert a zipper in the side since I didn't cut the back and waist on the bias, and I hacked a bunch off the bottom because it was causing the blouse to hang funny. The vintage buttons are gifted from my evil twin.
Other people mentioned that the bust line seemed a bit high, so I sewed the bust/front waist seam at 3/8" seam allowance instead of 5/8", effectively lowering it 1/4" total, which I think helps just the right amount.
For the facing I used a red polka dotted quilting cotton, and following this advice [which may not be intended for v-necked facings, but whatever], I reinforced the point with a small square of organza and some fray check. Internet, how I love thee for facilitating the collective sharing of sewing wisdom - I doubt this crafting revival would look the same without you, oh purported invention of Al Gore's! And fellow bloggers, how I doubly love thee for posting tutorials, tips, lessons learned, and helpful shortcuts!
The major thing is that it needs a serious sway back adjustment. Again, maybe it's because I cut the back piece on the grain instead, and I also pinched out 1" at the waistline even though the pattern makes no mention of petite adjustment possibilities [that's right, Simplicity! I'm taking matters into my own hands!]
Also, as you can see here, I put in 2 rows of pintucks because I didn't decide to do my waist petite adjustment until after I sewed the bust/front waist pieces together and finished the seams, after which I was too lazy to unpick everything and recut the waist piece. 2 rows of 1/4" pintucks = 1" fabric taken up! *Continues to pat self on back.* It kind of looks like a design element instead of a last-minute improvisation, if I say so myself.
Finally, those sleeve caps looked pretty ridiculous, plus I look horrible in cap sleeves, so I added 1" to the bottom of the sleeve and lowered the sleeve height by cutting it out at the smallest sleeve cap at the top [which was also the shortest], and then blending away the difference at the edges. I think it worked reasonably well, though I could probably stand to get rid of some width. Also, in retrospect since I'm using a zipper to get in and out of this, I don't think there's any reason I couldn't cut the waist panel down by a size or two to make it more fitted.
With this blouse, I'm skulking in my final summer "essential" for the sew-along well past the due date. There's really nothing "essential" about any of the blouses I sewed this summer, except that I wanted to start learning how to make blouses and they seemed like as gentle a starting point as any. Plus all 3 will layer well from spring to fall, which, in my book, counts as essential to building a versatile, fun, yet reasonably minimal-like* wardrobe.
*of course, any wardrobe that takes up as much room as mine does really cannot be considered minimal. I make liberal use of the word like.
Sunday, August 29, 2010
Skirt #23: Kasia
For the longest time, I knew my style exactly. Fun, colorful, printed A-line summer skirts, paired with a handful of basic tops [I have 2 white button-downs, plus a blouse/tee in black, red, aqua, navy, persimmon, and green ... and that seems to match every skirt I own]. But then I started sewing blouses this summer, and I participated in Me-Made-May, and that completely switched up my thinking. One, I realized there were so many looks out there that I hadn't tried in, oh, ten years, and since my current look is based on how comfortable I was with my body as a teenager, it seemed like time to branch out. Two, I suddenly found myself needing a couple fitted, neutral summer skirts that could anchor colorful blouses. That was the idea behind the Beignet, and that was also the idea behind this latest skirt.
The free Burda pattern Kasia seemed to have everything I look for in a skirt. Classic with a twist. Fun details. And who doesn't like free? Between you and me, that's my favorite price.
Pardon the wrinkles in the photos. Had taken this skirt out for a test run before I got around to photographing this. Also, due to many, many user errors [read: my own sewing mistakes, then lots of fudging to compensate], this thing lay strewn in the sewing pile forEVER before I finally finished it. The fabric is some unknown "washable suiting" blend from Winmil Fabrics that smells strongly of polyester when I iron it that was gargantuan yardage for $10, so if I wanted I could probably make another 3 skirts out of it. I don't [I wish I liked the fabric better, it's a versatile color, and that strategy would make for some low-cost skirts].
The good: Well, it certainly is neutral, fitted, and different than what I usually make/wear. And I'm glad I didn't make the front bib but converted it into a pocketed, waistbanded skirt instead.
The bad: I hadn't anticipated how the hip panels make it impossible to wear your blouse untucked, which unfortunately means this is not as versatile as I thought it would be. I chose not to line it and I think that was a mistake.
The user mistakes: Somehow I zoned out on the fact that the front and back hip panels are not the same size, so I think I mixed those up because that waistband did not line up. That, or when I tried to simplify the waistband by cutting it in one piece, I effed up the dimensions somewhere, but somehow I wound up taking 5 inches total out of the waist and grading that out to the hips, and the upper hips are still poofier than they're supposed to be, I think. Also, I couldn't find any indication in the instructions if the given size was for the final skirt dimensions [with ease] or for your body dimensions [i.e. without ease].
Intended to make a back vent instead of just a slit, but there were so many off-the-cuff modifications that I decided, for once, to just make my life easier. I really like the length though [pinched out 1" at the petite adjustment area and made a narrow bottom hem to keep it just below-the-knee]. Somehow when this hit above the knee, the proportions look off ... maybe it's a petite thing or maybe it's in the eye of the beholder. Plus, I'm getting a little tired of short hems [which, for me, means 1-2" above the knee] -- maybe it's seeing them everywhere, the visual equivalent of when a song gets overplayed on the radio?
O-kay. I am not exactly sold on this but I am more sold on it than the Beignet, and I think it will at least survive my move back to CA. Also, when my friend John told me that I should just get out my ruler for button placement instead of ye olde Eyeballing Technique and I pshaw'd him that it was more fun this way ... next time, I might listen to Farmer John.