Showing posts with label petite alterations. Show all posts

Sunday, February 10, 2013

2 FOs; Ali sighting; Treat Yourself

First finished sweater (and handknit) of the new year:
 

Fiber #58 :: Andi
Pattern: Chuck
Yarn: Cascade 220, a shade my mom calls "more brown than yellow" in response to the "Asians shouldn't wear yellow!" that I keep throwing around.  I need more mustard in my life like I need more handknits, but hey, it's a gorgeous pattern and I love it.  (Color on the right is more true to life)
Mods: added an extra cable twist, lengthened pattern to hit at high hip, used 2*2 ribbing instead.

I took a hard look at my handknit sweaters and realized the ones I wear most often are long sleeved, unfussy pullovers, and in colors that match everything else in my wardrobe.  So I decided those were the types of sweaters I'd knit more of.

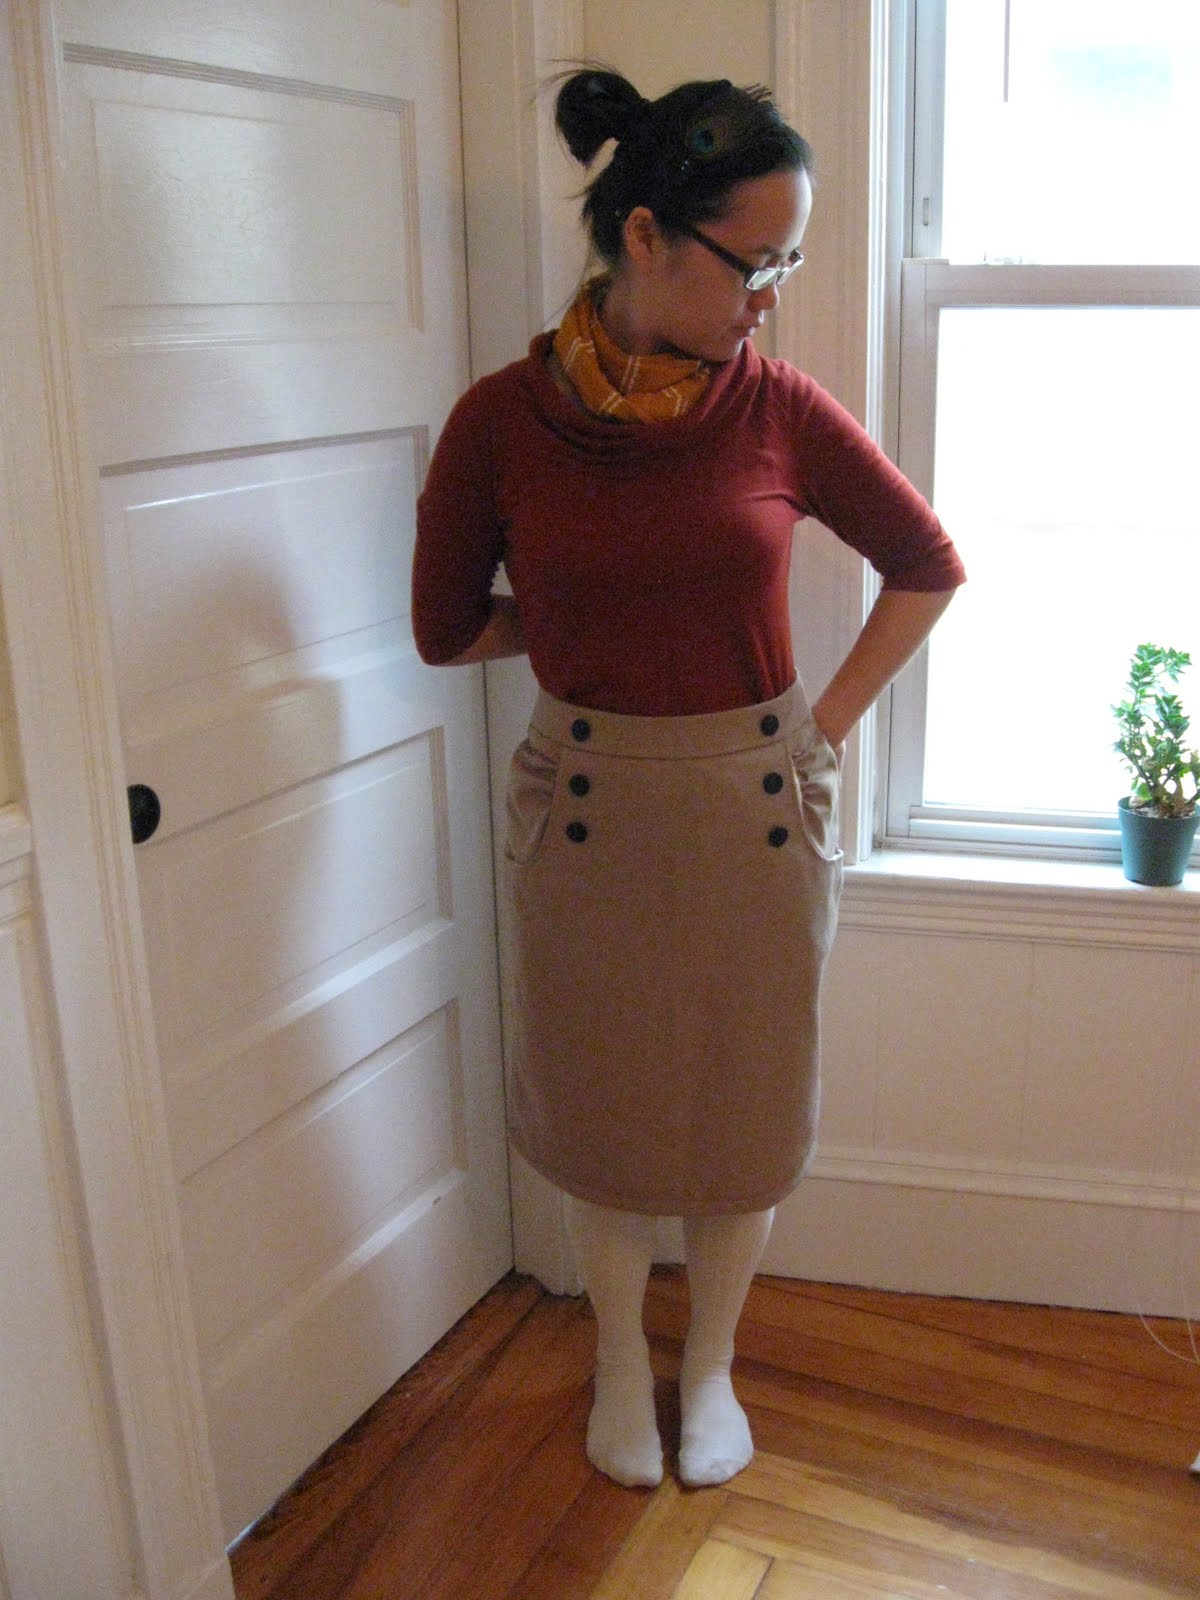
And a skirt to go with it.


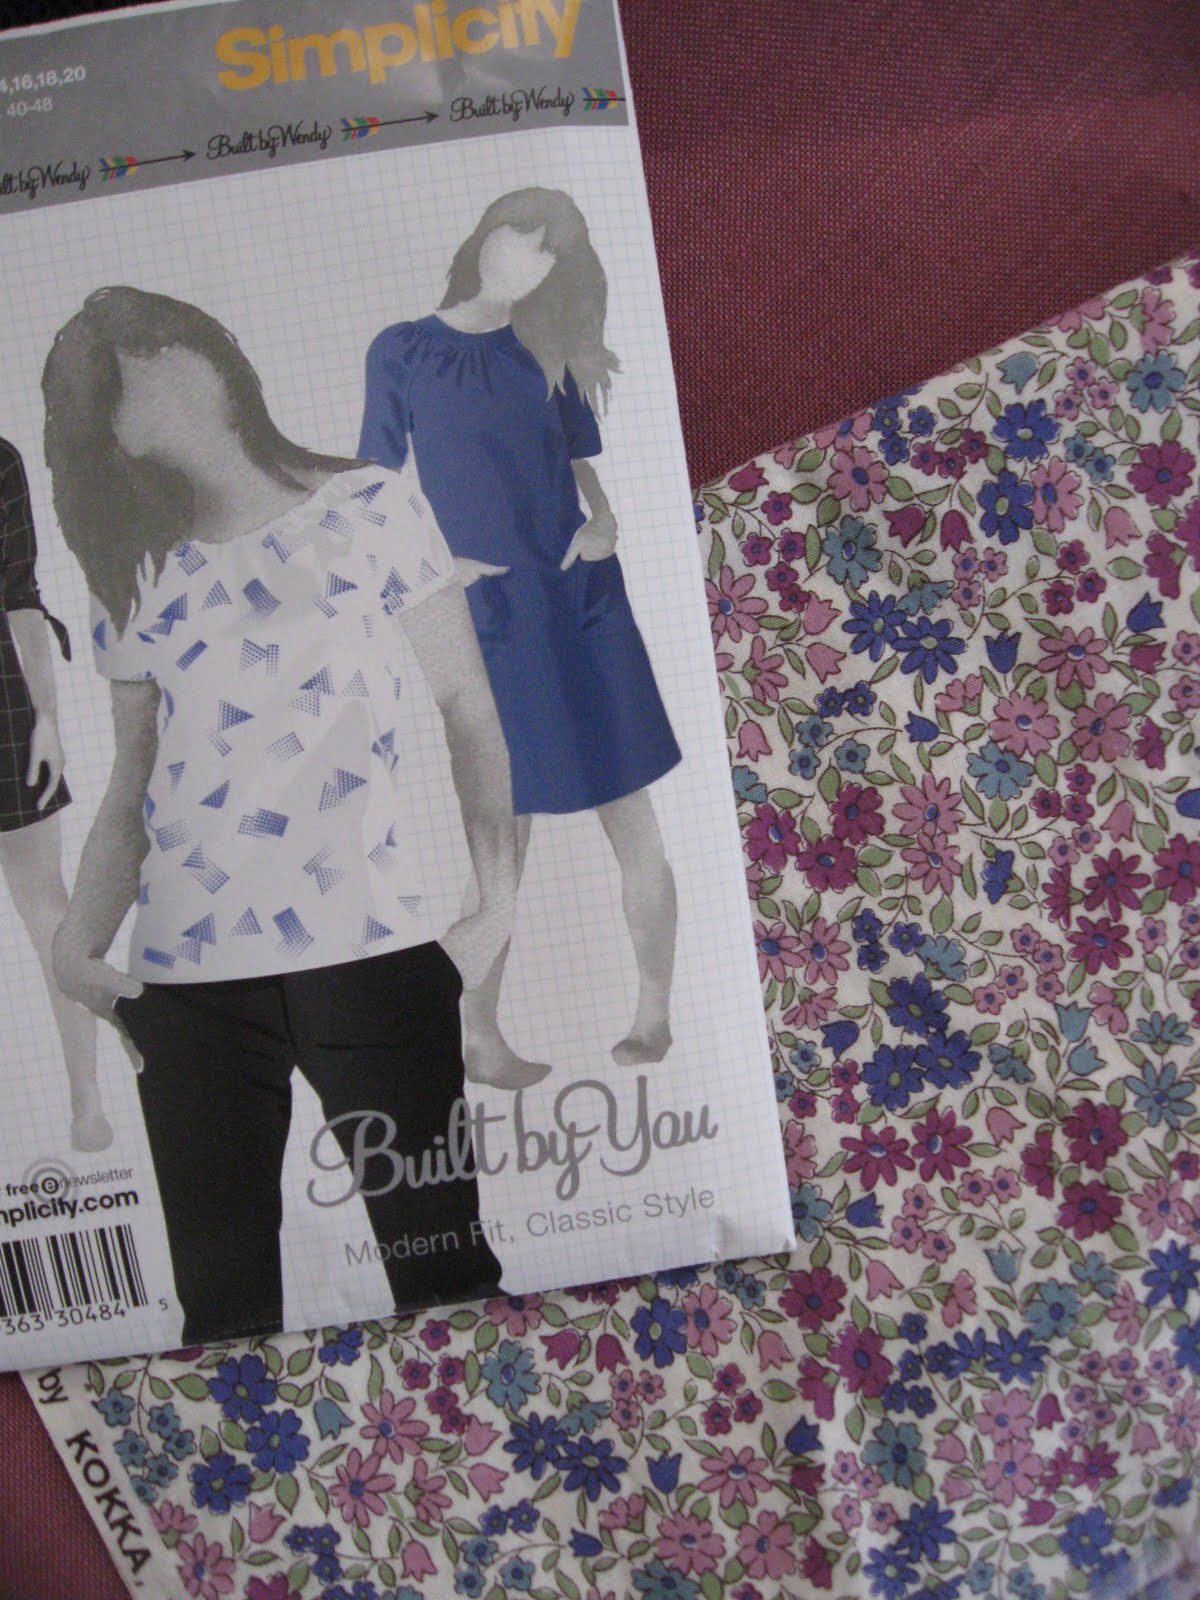
Pattern: Simplicity 2451, again
Fabric: Liberty twill Mirabelle, plus leftover red piping
Mods: shortened at hip and skimmed some of the curve out of the hipline, added a Rayon bemberg lining.  This skirt was meant to be piped!

Also, for those of you dying for your Ali fix, rest assured, she's still alive and kicking.  Late in 2012 I asked if she would be willing to do a swap, a handknit hat in exchange for a couple Renfrews.  I think I came out ahead, check out the stripey beauty she made me!  (Erg, the hat is awaiting a second skein, via Ravelry, to be completed).  Ali and I wear roughly the same size, and sometimes when we grow out of enamorment with our own handmades, we'll do a swap.  We had a stripey exchange, one might say!


Over the holidays, my brother and I took a quick jaunt up to Portland for a couple days.  The city is on both of our "maybe, someday" lists and we thought it would be fun to treat ourselves to a bit of a relaxation.  We found a place to stay through Air BnB - which I highly recommend - and opted to use Portland's public transportation the entire trip - which I do not recommend, not in winter, at least.  There was a lot of waiting for buses in the rain.  However, if I had to do a lot of waiting for buses in the cold, cold rain, there is nobody I'd rather do it with!

We napped.  We cooked.  We spent a lot of time in cafes.  I knit and read and wrote and dreamed and journaled and people watched.  We stared off into space.  We took a ridiculous number of "use iPhone to take pictures of self" photographs that we then had way too much fun hipster-izing with Michael's phone's editing tools.


Michael really likes the show It's Always Sunny In Philadelphia, and during the trip he told me about one episode where the characters decide to treat themselves for the entire day.  I haven't seen the episode, but apparently it involves people running around in Batman costumes, increasingly ludicrous scenarios (as seems to be the show's mantra), and a whole lotta "TREAT YOURSELF."  So, that was the motto of our trip, too.

Jessica (in fabric store): Hm, that's kind of a lot of fabric.
Michael: Jessica?  TREAT YOURSELF.
Michael (reaches into wallet): Here, I'll treat you to this one.  *Hands me bill, pats topmost bolt.*


Michael: Fake Moleskine?  Real Moleskine?  I came here to buy the fake one.
Jessica: TREAT YOURSELF.

Jessica: Should I get that flourless chocolate cookie the size of my head?
Jessica: You know what, I should really TREAT MYSELF.


So ... I treated myself this holiday season.

Some Liberty and Sewaholic patterns.  Will 2013 be the year I finally tackle pants?


Some Cake and organic jersey.  Trying not to go too crazy in the knits department, but it's so tempting ...


A yummy new pattern, and some stash yarn.  My latest attempt to control the yarn stash is this rule: for every project I take on with new yarn, I have to complete a project using stash yarn.  Now, some of the stash projects are hats, which is not as stash busting as, say, a sweater, but I will take all the help I can get.  Perhaps I should extend this rule to fabric, too.  Anyways, I used my Christmas money to splurge.  Usually I use my Christmas money to buy boring things like groceries and pay for electricity and such, but this year I figured, it's been a long year honey.  TREAT YOURSELF.

Since this is not exactly a sustainable trend (Christmas money comes but once a year!), I started thinking about the small ways I like to treat myself.  I find it hard to walk that line between frugality and, well, misery.  Sometimes I feel guilty that I am indulging too often in 'simple' pleasures of the non-free variety, but other times I remind myself that it's important to be nice to yourself.  Maybe it's just a question of degree.  Anyways, here are some of my little indulgences.  I figure it's never a bad thing to have a list like this to turn back to from time to time.

Naps. Better still, two in one day!

A skein or two of tasty yarn.


Fresh berries in summer. A basket of fresh figs in fall. Heavenly!

Sunday afternoon meals that take 2-3 hours to prepare. Even better is when I clear my plate for the evening as well, so that I'm not rushing around but can linger in the kitchen.

Decaf lattes. Don't laugh, I know that defeats the purpose of the espresso in the latte! I can't do caffeine, but every once in awhile I will hop into a coffee shop and ask for a decaf. It always makes me feel ridiculously indulgent to do this, probably because I take the opportunity to linger in the cafe, do some people watching, or pull out some knitting, my journal, or a book. Ah, unstructured personal time, what bliss.


Filling a large glass half full with ice, topping it off with a fizzy drink, squeezing in half a lemon, and climbing into the tub for a good soak.

What about you?  What are your small indulgences?  I figure it never hurts to have more ideas for this type of thing!

Sunday, November 18, 2012

Fiber #49 // Stripes of gold


The first FO from my autumnal plans!  I know what you're thinking.  "Yawnzers, Jessica, another sweater?  It doesn't look all that fancy."  Well, I'm here to tell you folks, this was my first time winging a sweater pattern, start to finish, and it turned out pretty darn well, if I do say so myself.  Boatneck secured with little buttons at the collar, 3/4 sleeves, cream and gold striping?  Yes, yes, yes.


I believe I used a purchased sweater pattern as a general guide for shoulders and sleeves, even though my gauge was 22 stitch/4 inch instead of the prescribed 19st/4in.  Living dangerously!  You'll notice I even did some stripe matching at the sleeves.  How's that for getting overly fancy, and all that.


Fiber #49 // Stripes of gold
Pattern: slapdash/seat of my pants
Yarn: recycled mystery yarn from cowl purchased on Etsy; Louet Gems Sport (merino) in cream or ivory, 2.1 hanks
Needle: size 5
Notions: 4 buttons harvested from this refashion

Boring construction notes:
*Used 3 sets of short rows at each shoulder, front and back, so that the pieces would overlap sufficiently to attach the buttons
*No button holes, just stitched the buttons straight on, and secured the seams with some stitching along the ribbing (using the Louet)
*Jogless stripes, going towards the back, and when I got to the underarm split I just switched colors along the edges, which does mean I have one not-exactly-parallel stripe somewhere near my right shoulder blade.


Winging your own sweater pattern does slow down the process considerably, and is generally prone to increased frustration over ripping and re-ripping back sections.  However!  The more I both knit and sew, the more confident I become in figuring out my body, and, just as importantly, getting a sense for what types of shapes, and at what proportions/measurements, create the type of garment I like.  For example, I know I prefer cropped blouses and sweaters - its a petite thing, but it also lets me pair tops with both pants and skirts, which is important for me since mix-and-match versatility is a high priority for me.  Don't have enough hours in the day to go crafting clothing that just goes with pants or with skirts ...

This also means that, armed with a ruler (which I'm often missing when  I knit on the road ... I try to substitute in various body parts of which I have a vague sense of their length ... NOT recommended), some math skills (mine often disappear on me), and a general working knowledge of construction options, increase/decrease possibilities, and stitch patterns ... there is no end to the possibilities!  So expect more of these in 2013.


I am immensely satisfied with this sweater. In fact, I may go so far as  to get big-headed and proclaim myself as making significant progress on this whole "10,000 hours to becoming an expert" thing, and at crafting a handmade wardrobe, no less.  Now, ahem, have I invested more total hours towards crafting or writing?  Erg ...

Tuesday, December 27, 2011

Refashion #30 // Dress #8 :: Cranberry Cocktails


Holiday season means dressy occasion season! Though I cannot lie to you, I hate dressing up. I hate fussing with my hair and worrying about the fact that I haven't a clue how to put on makeup (Asian eyes! How does one "sweep eye shadow over the lid until the crease" when there is no crease???). I also hate fretting about the fact that I have no appropriately dressy clothing. Thankfully the thrifting gods have stepped in on that front, and after a couple lucky scores and a bit of elbow grease, I now have not one but two cocktail-esque dresses that I can prance about in.


So ... this started out its life as a prom dress. I think I'm wearing 2" heels in the "before" photo and it still drags on the ground.


Originally I was just going to use gather the bottom to a wide black elastic waistband to make a super poofy but festive skirt to layer over a lace tee (tres trendy ... but maybe tres 2011?), but then my mom gushed over how pretty the bodice was, and so I tried it on and it turned out it actually fit me! How's that for thrifting karma?

To make a long story short, I basically chopped it off at the waist, chopped again 20.5" from the bottom of the skirt, removed 2 of the back panels (it was a 7-panel dress), put in pleats at the skirt waist for a 50's-inspired silhouette, and stitched the whole thing back together. The pleats atop are inspired by Zoe and exist because I hate strapless dresses and was going to add in halter straps (and then use the pleats to disguise the hemline), but when I added them on they looked strange and I made the last-minute decision to remove them, which is why, at 6:15 on a Saturday evening, I was still hand-inserting the zipper (cocktails started at 6:00, oops!)


The dress is a stiff 100% silk with horsehair trim inserted into the hemline, which is why it has such body. I had to iron those pleats in to take down the poof! Word to the wise, be careful when pressing pleats into silk. Those things don't come out so you better get it right the first time around ... and it'll hang funny if you don't get the angles right (which I didn't, exactly). I think it really needed the velvet ribbon belt, but looking at photos of the dress on and the floppiness of the bow, I think I should just attach with a vintage-esque bling-y brooch next time around (I put the matching bow in my hair. You can see the dress in vivo below; I cropped my coworker's faces as I wasn't sure if they wanted to appear on this blog!)


Truthfully, I don't think this is the best look for me. I feel very ... square ... in this dress. My bust ratio is not terribly pronounced, as it is my shoulder:waist and waist:hip ratio that gives me the appearance of curves, yet strapless dresses like this one are all about the bust:waist ratio and showing off shoulders (but in a "check out how sculpted my shoulders look! I spent hours in the gym to get this look!" kind of way, and in an isolated, not tying-shoulders-into-rest-of-body-silhouette kind of way. And clearly, I am not somebody who sculpts her shoulder muscles ... I mean, these days the only workout they get is pushing fabric through a sewing machine or propping up a pair of knitting needles. Hm ... 2012, I'm lookin' at you!)

But on a positive note, at the company holiday party they surprised the members of the committee that I chair with an achievement award, which meant that when we went up to receive our award, 500+ people got to witness the dress in action. If ever there was a year to wear handmade to the company party, this was it. Viva La Refashion-lution!

And of course, because it's me, here's how I styled the dress during the chillier moments of the night ...

Sunday, May 08, 2011

Refashion #26 // Dress #5 :: Flutterbudget

That was Charles Ingall's nickname for his daugher Laura, wasn't it? I remember loving that series so much, especially the improvisational way they created a home from ... from scratch, really. That creating, that spirit of making do, those were the passages I would read and reread as a kid ... still do, when I'm feeling nostalgic. Maybe that's part of what drives my interest in refashioning and why it called out to me, so instantaneously, nearly 4 years ago now.

My latest dress, another dress refashion (we're aiming for 80!) ...


From this:


I think it's a sundress from ... the 90's? The 70's? Anybody? I zoomed in on it immediately in the thrift shop; something about the pattern really drew me in. And of course, we all know that overly large is OK when refashioning, and actually larger is better because it provides more source material. The dress had been worn so often that the tag has faded and I cannot tell what size it is marked at, or what the material is, but it's a lovely, cool, soft and drapey fabric that feels like it was already well loved before I got it, and doesn't look one bit worn.


To refashion this, I first took up the dress by about 2.5" on each side by flipping the dress inside out and stitching 1.25" from the original shoulder seam line. This lifted the entire dress so that the empire seamline hit under my bust instead of just above my natural waistline. As a kid, my mom used to adjust some of my dresses like this until I grew into them. It's a handy trick for petites to know ;-) ... especially if you don't want your bra strap showing at the armholes!


Then, because the dress was still too wide, I used smocking in the back to pull in the waist. I threaded elastic thread into my bobbin and made rows of stitches 1/4" apart. I marked where my natural waist falls, and smocked from the empire seamline until my natural waist. You could probably just mark your natural waist and smock 1" above and 1" below the waistline to cinch in at the narrowest part of your waist.


But what I'm most excited about: the sleeves!


Initially I'd planned to just hem it up and call it a day, but when I tried the dress on and looked in a mirror, it looked a little ... underwhelming. My body type is such that, if I don't somehow emphasize my shoulders, I tend to look very rectangular (whereas if I incorporate my shoulders into the silhouette then it gives the impression of an hourglass). So I used the 6" fabric strip from the bottom of the dress to play around with sleeve options, and this is what I settled on:


I utilized the hem of the dress as the sleeve hem, slid the raw edge under the armhole, pinned, and then pinned a couple pleats around the top edge of the sleeve cap. As I got towards the middle I started "slanting" the fabric inwards, so that the sleeve hem "enters" the armhole about 1" from the very bottom of the armhole. I stitched straight over the original armhole hemline, leaving raw edges underneath on the inside of the dress, which I then covered with some hem tape (handstitched in). It took some pinning and repinning, and the sleeves are definitely not symmetrical but with the flutter and the drape of the fabric, nobody can tell!


I'm pretty pleased with this one, if I do say so myself. I'm happy to have found an alternative to "take in the sides" or "cut out an entirely new dress" for refashioning an overly large dress, although I wouldn't try this for a dress that's really really big. And the sleeves just make it ... complete. It's liberating knowing that I can improvise some sleeves onto a refashion. Step by step, the ENTIRE thrift shop is opening up to me ...

Thursday, February 24, 2011

Refashion Co-Op - Come join us!


So ... you may have heard but there's a new collaborative refashion blog in town ... the Refashion Co-Op! Ever since Wardrobe Refashion shut down there's been a huge void in the eco crafting community, so seven of us got together to try to fill that hole a bit. We've got a great crew of contributors so far and welcome you pop by for some inspiration or to find like-minded crafters. And of course, if you refashion then consider contributing to the blog!


This here is a skirt that I refashioned from a larger pencil skirt (a favored trick of mine). I put up greater details in my post over on ReCo (hehe, as we nicknamed it during the planning stages), so pop on over there to take a gander!


I hope you'll join us! (And yes, this skirt will definitely be making appearances in MMM. It's a perfect work piece - formal and conservative enough so that the wearer can be taken seriously, but with its own unique flair and detailing, and neutral so that it can both go with just about anything and be worn quite frequently in an inconspicuous manner. I have taken to calling this combination S.E.W. - Simple yet Eminently Wearable, which is the name of this 26th skirt, 24th refashion of mine. One of these days, my refashions will outnumber my skirts. Re-Co will help me towards that goal :-)!)

Sunday, October 24, 2010

October Refashion Challenge III - Refashion #21 :: Bella


This time I started out, again, with a crewneck sweater that's been sitting in my closet, unworn, for several years now. Like the blue sweater, it's a bit large on me:


Anyways, as I was thinking about what new type of refashion I could tackle for my third crewneck, I was inspired by the black color to make this refashion very classic and simple: black and white, light embellishments, and a ballerina neckline.


Hehe, my dad only managed to catch one eye! Serves me right for tilting my head. Anyways, this was quite simple to pull off. I simply removed the ribbing at the neck, then I put the sweater on and measured where I wanted the neckline to reach - in this case, I extended it about 1" width-wise in either direction then curved it down and blended away to the front center. In the back, I lowered it about 1.5" and made a similar curve. The fact that it perfectly echoes my clavicle is, between you and me, the happiest of coincidences. I took the sweater in about an inch on each side, and narrowed the sleeves, too.

Courtesy of Sigrid's recent tutorial, I used some bias-cut silk ribbon to finish off the neckline by simply encasing the raw edge and handstitching in place. I got two sizes of buttons: one set to set off the neckline, and one set to hold my turned-up sleeves in place, as before:


Remember that huge fuss I made about handmade wedding wear? In the end, I wore this sweater and black slacks, set off by a pair of faux pearl studs, a peacock feathered headband and my hair pulled back in a bun, and a ring/bracelet set from my aunt. Very black and white. Very "erg, it's an outdoor wedding in a foggy part of California and the weather forecast calls for rain, I would rather be warm than fancy." Very "let's be honest, that gray dress is a tad too small and it has no stretch, I'd rather eat comfortably than be fancy."


Given that it was the Ritz Carlton, I was probably the most underdressed person there, although I like to think that personal style counts for something, so maybe we'll say "understated." And though I was ultimately happy with that choice, it did create a fair amount of hand-wringing on the night before the wedding.

The thing about Silicon Valley is that it holds enough people who don't think twice about dropping hundreds on an outfit, that whenever a fancy-type social event pops up on the calendar, it gives me pause that my handmade garments are somehow "good enough." Meaning expensive-looking enough, meaning fashionable enough, meaning ... well, meaning that they don't even look handmade, if I'm honest with myself. It's a strange type of inferiority complex, made stranger by the fact that I've known the bride and groom for almost 15 years, known my circle of friends who attended for over half my life.

Honestly, nobody who really knew me would care what I wore so much as the fact that I was there to share in the happy occasion, and as I stood there fretting on Friday evening, I realized I just needed to get over my insecurities and figure that if I just stepped into the room with confidence, nobody would even see the clothing I wore, just the smile on my face and the happiness in my eyes, happiness that these high school sweethearts were finally tying the knot after 10 years.

And maybe some people did point and whisper, but whatever. This is just who I am. And OK yes, maybe my mom does have a point that I could keep an eye out for some fancier black pants [and that, no, I can't just add fancy decorative trim to existing black pants ... she totally knows me, as she's the one who pinned in this sweater at the waist and arms] ... and OK yes, maybe next time I won't finish my outfit the night before the wedding [actually, I didn't even get the sleeve buttons in place in time] ... but I am happy I stuck to the plan and didn't resort to my high school Homecoming dress, if only because that's what I wore the night the bride and groom went to their first school dance together. Although, hm, now that I think about it, maybe that would have been poetically fitting ...

Wednesday, September 22, 2010

Following Your Joy (Skirt #24: Scooting Right Along)

When I first started sewing my own clothes, I was all about fun fabrics and self-drafted A-line skirts. Then dealing with the non-matching-patternness of self-drafted skirts caused fatigue to set in. And somewhere along the lines I got it into my head that quirky, playful fabrics are not "grown up" enough. Not sophisticated enough to warrant the hours of careful prep and multiple steps.

But what I realized is, hey, quirky is who I am. I am most ecstatic about the projects that have an element of playfulness to them, and for me, one of the truly unique qualities of handmade is being able to use fabrics that you really can't find in RTW venues. So I decided, for all those fashion outlet/bloggers that look down upon sewing with novelty prints or whatnot, well, who died and made them king of the universe anyways? If it brings me joy, and I'm the one slaving over the dang sewing machine anyways, then heck, I better use some fabric that I absolutely adore.

But in a nod to upgrading the wardrobe slightly towards passable-in-a-professional-setting, I began tinkering around with self-drafted pencil skirts again. I've always had this particular Achilles heel in my self-drafted pencil skirts though:


Very random "bubbling" or "rippling" effect that I get at the hips. And always more pronounced on the left side than the right. It took me ages to realize, hey, taking it in horizontally until there is no ease left doesn't get rid of the rippling ... I need to take a VERTICAL tuck!

Turns out that when the Sew What! Skirts formula called for 8" between waist and hip, they did not mention that this is actually a range of 7"-8" in most women ... and that, you guessed it, as a petite lady, I'd verge closer to 7" than 8". Also, apparently, I need more of a tuck on my left side than my right. I blame badminton for permanently asymetricalizing my hips and thighs.


Tada!!! This is an Echino cotton/linen blend, and MY but it is FUN to wear about. Fully lined in rayon bemberg [I believe my exact words were: "I see why people hate working with this $#@%!" ... but definitely worth the effort]. Used Tasia's tutorial for lining up prints, Sunni's tutorial on the sewing in a back vent with lining, Sommerset's tip about reinforcing a clipped point with Fray Check and organza, Sunni's advice to use organza on the back seam to prevent warpage, and Gertie's advice to prevent the waist seam from warping with similar means [sorry, can't find her exact link right now].


Woohoo! My pencil skirt sloper still has a couple minor quirks to work out, but I'm super excited about this skirt and others to come ...

Oh yes, and I read in Stitch to put a layer of tissue paper under silk to prevent slippage when cutting ... do you think that would work for rayon bemberg too? Cuz I love the end results of this stuff and would like to decrease the number of 4-lettereds I utter when using it.

Friday, September 03, 2010

How Simplicity 3835 lost 1K

This blouse was a long time coming. Last February [2009], I think, I read on Film in the Fridge that a shop in Wisconsin, maybe?, still had some Flea Market Fancy for sale. I didn't stumble upon this fabric line until it was too late to do anything but admire other people's projects with it, so I put in a call and spoke to a very nice woman who told me which fabrics she had left, promised she would mail me my yardage, and then asked me to please, please send a check back to the return address since she wouldn't know how much the total bill would come to until she brought it to the post office. Talk about customer service [and trust]!

So anyways. It seemed like an awful lot of trouble to go through for some fabric if I was just going to waste it on a so-so project, so the fabric lingered in my stash forever. Finally, when I cut out that second S3835 blouse, I said, screw it, let's just cut two, at least the fabric won't be collecting dust!

It took 16 months for me to make the first cut, and another 16 hours to realize, bad idea. Ugh. Go me. Anyways, after much thought, I decided I could probably salvage the pattern pieces with Simplicity 2614 [love this version here! Oh, that red/orange plaid totally gets under my skin] if I cut everything on the grain and cut the back piece out of my remaining fabric. Which worked, and I now have the barest scraps remaining of this delightful fabric. Boo, poor planning, but yeay, thinking on my feet. Ish.

Blouse #5: Gathering Posies.


For a blouse made out of quilting cotton, it's pretty good, actually. I had to insert a zipper in the side since I didn't cut the back and waist on the bias, and I hacked a bunch off the bottom because it was causing the blouse to hang funny. The vintage buttons are gifted from my evil twin.

Other people mentioned that the bust line seemed a bit high, so I sewed the bust/front waist seam at 3/8" seam allowance instead of 5/8", effectively lowering it 1/4" total, which I think helps just the right amount.

For the facing I used a red polka dotted quilting cotton, and following this advice [which may not be intended for v-necked facings, but whatever], I reinforced the point with a small square of organza and some fray check. Internet, how I love thee for facilitating the collective sharing of sewing wisdom - I doubt this crafting revival would look the same without you, oh purported invention of Al Gore's! And fellow bloggers, how I doubly love thee for posting tutorials, tips, lessons learned, and helpful shortcuts!


The major thing is that it needs a serious sway back adjustment. Again, maybe it's because I cut the back piece on the grain instead, and I also pinched out 1" at the waistline even though the pattern makes no mention of petite adjustment possibilities [that's right, Simplicity! I'm taking matters into my own hands!]

Also, as you can see here, I put in 2 rows of pintucks because I didn't decide to do my waist petite adjustment until after I sewed the bust/front waist pieces together and finished the seams, after which I was too lazy to unpick everything and recut the waist piece. 2 rows of 1/4" pintucks = 1" fabric taken up! *Continues to pat self on back.* It kind of looks like a design element instead of a last-minute improvisation, if I say so myself.


Finally, those sleeve caps looked pretty ridiculous, plus I look horrible in cap sleeves, so I added 1" to the bottom of the sleeve and lowered the sleeve height by cutting it out at the smallest sleeve cap at the top [which was also the shortest], and then blending away the difference at the edges. I think it worked reasonably well, though I could probably stand to get rid of some width. Also, in retrospect since I'm using a zipper to get in and out of this, I don't think there's any reason I couldn't cut the waist panel down by a size or two to make it more fitted.

With this blouse, I'm skulking in my final summer "essential" for the sew-along well past the due date. There's really nothing "essential" about any of the blouses I sewed this summer, except that I wanted to start learning how to make blouses and they seemed like as gentle a starting point as any. Plus all 3 will layer well from spring to fall, which, in my book, counts as essential to building a versatile, fun, yet reasonably minimal-like* wardrobe.


*of course, any wardrobe that takes up as much room as mine does really cannot be considered minimal. I make liberal use of the word like.

Sunday, August 29, 2010

Skirt #23: Kasia

When it comes to skirts and sewing and a versatile wardrobe, I really think you need to be strategic. For maximum mix/match potential, it helps to decide: am I a printed skirt/solid blouse person? Or do I prefer to anchor printed blouses with solid skirts? That way you can have a few solid blouses/skirts in heavy rotation and then go crazy with pairing them with all sorts of fun coordinates in a couple colorways. And also, am I an A-line skirt kind of girl, which generally begs fitted tops to balance proportions, or do I like fitted skirts, which is a bit more forgiving in terms of blouse options?

For the longest time, I knew my style exactly. Fun, colorful, printed A-line summer skirts, paired with a handful of basic tops [I have 2 white button-downs, plus a blouse/tee in black, red, aqua, navy, persimmon, and green ... and that seems to match every skirt I own]. But then I started sewing blouses this summer, and I participated in Me-Made-May, and that completely switched up my thinking. One, I realized there were so many looks out there that I hadn't tried in, oh, ten years, and since my current look is based on how comfortable I was with my body as a teenager, it seemed like time to branch out. Two, I suddenly found myself needing a couple fitted, neutral summer skirts that could anchor colorful blouses. That was the idea behind the Beignet, and that was also the idea behind this latest skirt.


The free Burda pattern Kasia seemed to have everything I look for in a skirt. Classic with a twist. Fun details. And who doesn't like free? Between you and me, that's my favorite price.

Pardon the wrinkles in the photos. Had taken this skirt out for a test run before I got around to photographing this. Also, due to many, many user errors [read: my own sewing mistakes, then lots of fudging to compensate], this thing lay strewn in the sewing pile forEVER before I finally finished it. The fabric is some unknown "washable suiting" blend from Winmil Fabrics that smells strongly of polyester when I iron it that was gargantuan yardage for $10, so if I wanted I could probably make another 3 skirts out of it. I don't [I wish I liked the fabric better, it's a versatile color, and that strategy would make for some low-cost skirts].


The good: Well, it certainly is neutral, fitted, and different than what I usually make/wear. And I'm glad I didn't make the front bib but converted it into a pocketed, waistbanded skirt instead.

The bad: I hadn't anticipated how the hip panels make it impossible to wear your blouse untucked, which unfortunately means this is not as versatile as I thought it would be. I chose not to line it and I think that was a mistake.

The user mistakes: Somehow I zoned out on the fact that the front and back hip panels are not the same size, so I think I mixed those up because that waistband did not line up. That, or when I tried to simplify the waistband by cutting it in one piece, I effed up the dimensions somewhere, but somehow I wound up taking 5 inches total out of the waist and grading that out to the hips, and the upper hips are still poofier than they're supposed to be, I think. Also, I couldn't find any indication in the instructions if the given size was for the final skirt dimensions [with ease] or for your body dimensions [i.e. without ease].


Intended to make a back vent instead of just a slit, but there were so many off-the-cuff modifications that I decided, for once, to just make my life easier. I really like the length though [pinched out 1" at the petite adjustment area and made a narrow bottom hem to keep it just below-the-knee]. Somehow when this hit above the knee, the proportions look off ... maybe it's a petite thing or maybe it's in the eye of the beholder. Plus, I'm getting a little tired of short hems [which, for me, means 1-2" above the knee] -- maybe it's seeing them everywhere, the visual equivalent of when a song gets overplayed on the radio?

O-kay. I am not exactly sold on this but I am more sold on it than the Beignet, and I think it will at least survive my move back to CA. Also, when my friend John told me that I should just get out my ruler for button placement instead of ye olde Eyeballing Technique and I pshaw'd him that it was more fun this way ... next time, I might listen to Farmer John.

Friday, June 11, 2010

Blouse #3 // Watercolor Garden // Simplicity 3835 // Summer Essentials Sew Along #1

For once in my life, being short has really paid off.

Short. Now there's a 5-letter "S" word that's music to my ears.

Others:

Score!!!

Sweet!!!

Smok'n!

OK. Stretching here. Anyways. I mention the S-word because awhile ago I brazenly ordered a yard of Nani Iro cotton linen with the intention of making a blouse out of it. I really could only afford a yard, and I didn't bother to check the Simplicity 3835 yardage requirements but just assumed - yes, assumed - that it would be enough.


And it was!!! Hence the other S-word lovin'. [OK but if you are not 5'2" and do not shorten your pattern by 3" then do not follow my lead but do yourself a favor and order that extra 1/8 yard or whatever the pattern calls for]

Oh, man. I had this interview that I have been flipping out about for, like, 3 weeks ever since they called and asked me to go in to meet in person. Because lets be clear: I have never worked in much of what we would call a formal work setting before. Prior workplaces were like, we work with teenagers, wear whatever you want. Or, you are coaching from a cube and nobody can see you, we don't care if you come in your PJ's [and one woman did, and that was always a sign to not bother her OR that her birthday month was up, which was pretty much one and the same].

So anyways. Yesterday the interview was done, I was happy to sleep in my own bed again, and all I wanted to do was SEW. Sew, sew, sew. Sew I did.


I kept trying to convince myself that the cotton-linen loose weave wasn't too badly see-through, but finally common sense prevailed so I've flatlined this entire blouse which normally would make it too hot for summer except it IS Boston [and incidentally, I wore that sweater while making this because it dropped into the 50's for a blip of a day]. Flatlining has given the blouse some heft and also prevents it from wrinkling so much.

Silly me. Somehow I thought I'd have enough fabric left over for a blouse yoke, but it took some really creative cutting, plus shortening the blouse pattern by about 2 inches, in order to eke this blouse out of 1 yard of fabric.


All that remains. I cut out a size 10 back and size 12 front and am so happy with the fit, although maybe I need to move those back darts closer to the center? Dunno but a lot of the back wonkiness from last time is gone. I removed the upper chest adjustment from last time and realized that, duh, I had cinched the elastic in too tightly so it was pulling the entire dress up too high. This still fits over my head without a zipper, looks moderately fitted, and does not have that weird 'you left no bust ease' look that I am never going for but sometimes get and which must mean that I am slightly deluded about my measurements.


I admit it~! I did a massive happy dance when this was done. This is the unedited version of what Sewing With Jessica looks like. Actually, this is:


Haha, it was a wiggling happy dance.

Man, if I really get more serious about this garment sewing, I am going to seriously consider investing in a serger. I think I spend about 2 x's as long on finishing my seams as I do on the actual construction! Probably because I am massively OCD about this so every seam gets felled, frenched, or finished with bias tape.


Plans for more. Ali, I don't know if this is veering from "essentials" and into "excessive" ...